> ## Documentation Index
> Fetch the complete documentation index at: https://docs.wizflow.io/llms.txt
> Use this file to discover all available pages before exploring further.
# Autofill chatflows
> Save time by creating reusable profiles to automatically fill chatflow responses
 ## Overview
The Autofill Profiles feature allows you to save and replay chatflow responses, making it easy to test different scenarios without manually entering data each time. This is particularly useful for:
* **Testing**: Quickly test flows with different user profiles
* **Demonstrations**: Show how the chatflow works with pre-filled data
* **Development**: Speed up the development process by reusing test data
* **Sharing**: Share pre-filled chatflows with team members or clients
## Getting Started
Before creating an autofill profile, you need to enter at least one response in the chatflow. This gives the system data to save in your profile.
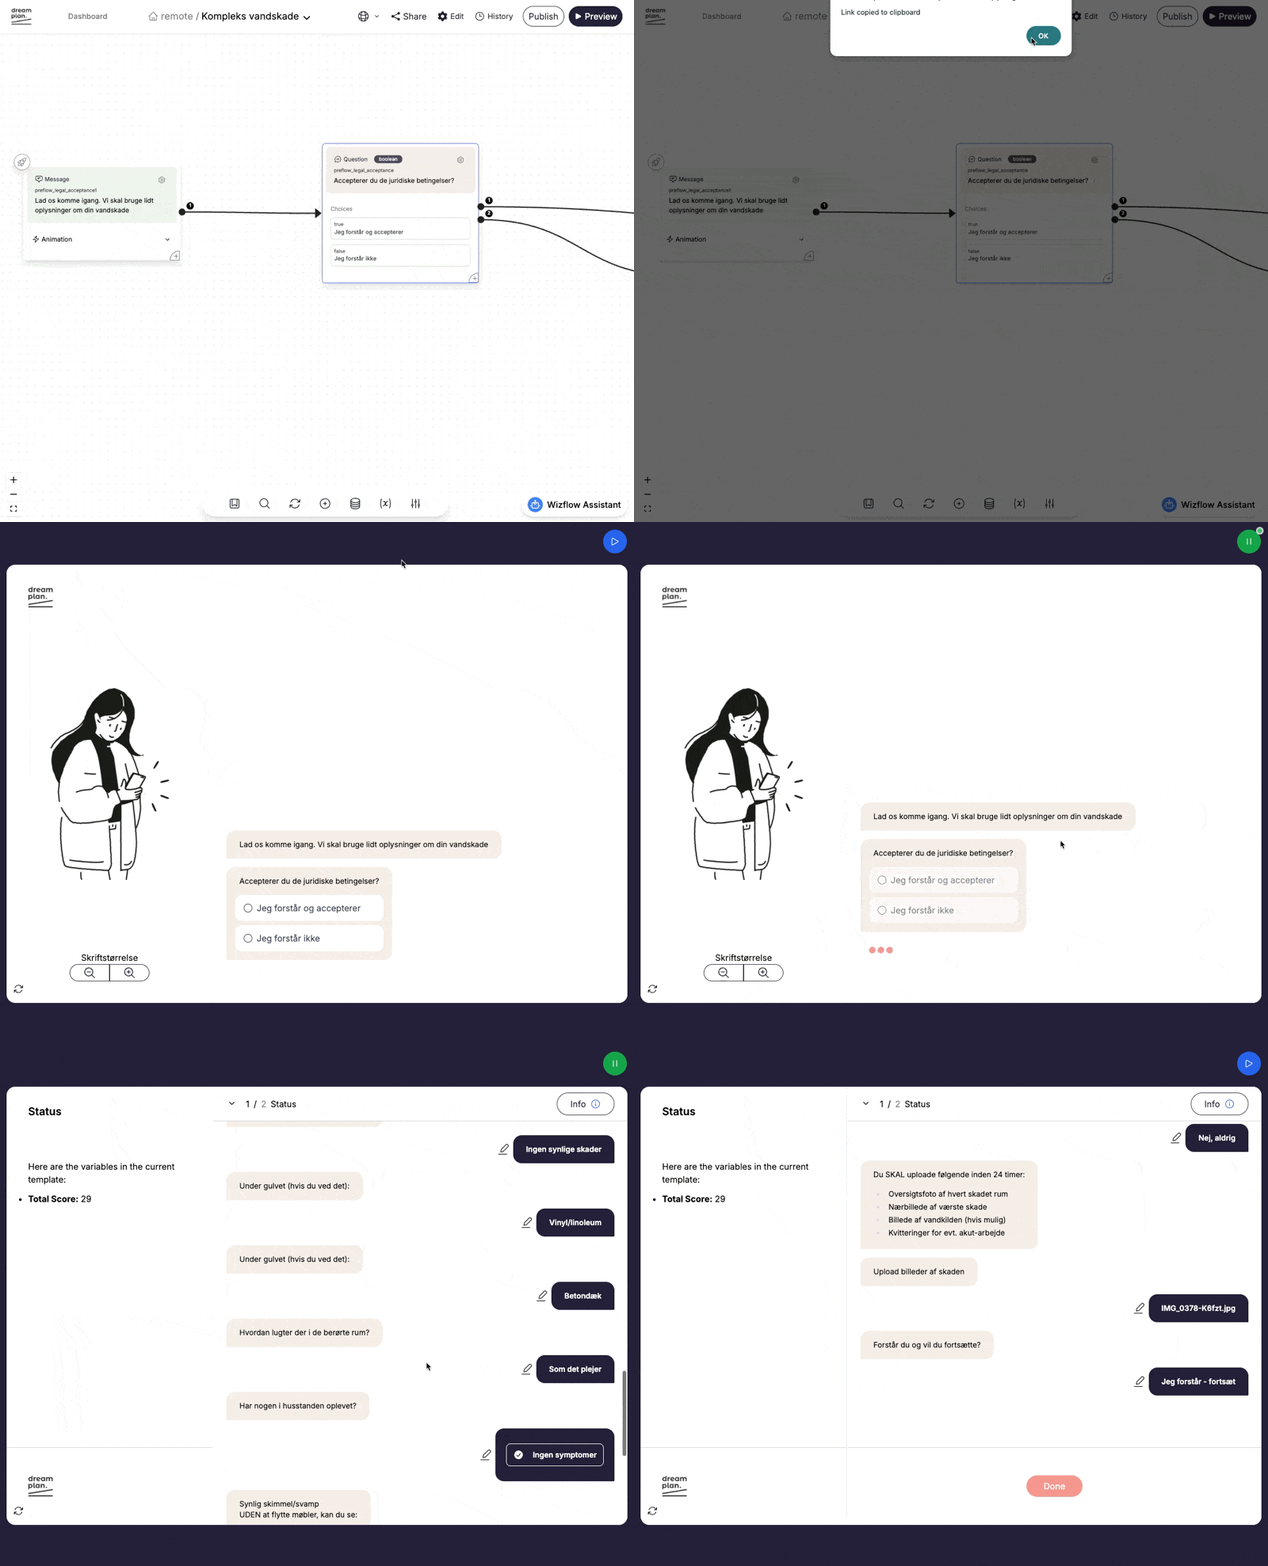
Look for the blue play button icon in the top-right corner of the flow editor. This is your gateway to the autofill profiles.
Click the play button to open the profiles modal, then click "Create Profile" to save your current responses.
## Creating Profiles
### From Current Responses
The easiest way to create a profile is from your current chatflow responses:
1. Complete the chatflow with your desired responses
2. Click the blue play button in the top-right corner
3. Click "New" or "Create Profile"
4. Enter a descriptive name for your profile
5. Click "Save Profile"
Profile names should be descriptive to help you identify different test scenarios. For example: "Single User - Basic Plan" or "Family - Premium Features".
### Profile Storage
Profiles are stored locally in your browser's localStorage. This means:
* Profiles are specific to the device and browser you're using
* They persist between sessions
* They won't sync across different devices
* Clearing browser data will remove saved profiles
## Using Profiles
### Playing a Profile
To replay a saved profile:
1. Click the blue play button to open the profiles modal
2. Find the profile you want to use
3. Click the play button next to the profile name
4. The chatflow will automatically start filling in responses
The autofill will proceed through the chatflow automatically, submitting each saved response in sequence. You can stop the process at any time by clicking the pause button.
### Profile Status Indicators
* **Green dot (Active)**: Profile is currently running
* **Red banner (Error)**: An error occurred during autofill
* **Blue button (Idle)**: Ready to start a new autofill session
## Managing Profiles
### Viewing Profile Details
Click the information icon next to any profile to see:
* All saved responses
* Response values
* Skip status for optional questions
* Additional arguments or metadata
### Exporting Profiles
Profiles can be exported in multiple ways:
1. Click the export dropdown next to a profile
2. Select "Download as JSON"
3. Save the file to your computer
1. Click the export dropdown
2. Select "Copy to clipboard"
3. Share the JSON data with team members
1. Click the link icon next to a profile
2. The URL with pre-filled data is copied to your clipboard
3. Share this URL to let others start with your responses
### Importing Profiles
You can import profiles from other users:
1. Click "Import" in the profiles modal
2. Select a JSON file containing profile data
3. The profile will be added to your list
1. Copy profile JSON data to your clipboard
2. Open the profiles modal
3. Click "Paste" if a valid profile is detected
Open a shared URL containing the `prefill` parameter, and the profile will automatically start playing
### Deleting Profiles
To remove a profile:
1. Click the trash icon next to the profile
2. The profile will be permanently deleted from localStorage
Deleted profiles cannot be recovered. Consider exporting important profiles before deletion.
## URL Sharing
The autofill feature supports sharing pre-filled chatflows via URL:
### Creating a Shareable URL
1. Save a profile with your desired responses
2. Click the link icon next to the profile
3. The URL is automatically copied to your clipboard
### URL Format
URLs use compressed data to keep them short:
```
https://example.com/chatflow/flow-key?prefill=[compressed-profile-data]
```
The profile data is:
1. Converted to JSON
2. Compressed using LZ-string compression
3. URI-encoded for safe URL transmission
### Using Shared URLs
When someone opens a shared URL:
1. The profile data is automatically extracted
2. The chatflow starts filling in responses immediately
3. Users can stop or modify responses as needed
### Error Handling
The autofill system handles various error scenarios:
* Invalid response submissions
* Network failures
* Malformed profile data
* Template mismatches
## Best Practices
Use descriptive names that indicate the test scenario or user type
Export important profiles regularly to prevent data loss
Create separate profiles for different test scenarios and edge cases
Share profiles with team members to ensure consistent testing
## Demo Video
## Overview
The Autofill Profiles feature allows you to save and replay chatflow responses, making it easy to test different scenarios without manually entering data each time. This is particularly useful for:
* **Testing**: Quickly test flows with different user profiles
* **Demonstrations**: Show how the chatflow works with pre-filled data
* **Development**: Speed up the development process by reusing test data
* **Sharing**: Share pre-filled chatflows with team members or clients
## Getting Started
Before creating an autofill profile, you need to enter at least one response in the chatflow. This gives the system data to save in your profile.
Look for the blue play button icon in the top-right corner of the flow editor. This is your gateway to the autofill profiles.
Click the play button to open the profiles modal, then click "Create Profile" to save your current responses.
## Creating Profiles
### From Current Responses
The easiest way to create a profile is from your current chatflow responses:
1. Complete the chatflow with your desired responses
2. Click the blue play button in the top-right corner
3. Click "New" or "Create Profile"
4. Enter a descriptive name for your profile
5. Click "Save Profile"
Profile names should be descriptive to help you identify different test scenarios. For example: "Single User - Basic Plan" or "Family - Premium Features".
### Profile Storage
Profiles are stored locally in your browser's localStorage. This means:
* Profiles are specific to the device and browser you're using
* They persist between sessions
* They won't sync across different devices
* Clearing browser data will remove saved profiles
## Using Profiles
### Playing a Profile
To replay a saved profile:
1. Click the blue play button to open the profiles modal
2. Find the profile you want to use
3. Click the play button next to the profile name
4. The chatflow will automatically start filling in responses
The autofill will proceed through the chatflow automatically, submitting each saved response in sequence. You can stop the process at any time by clicking the pause button.
### Profile Status Indicators
* **Green dot (Active)**: Profile is currently running
* **Red banner (Error)**: An error occurred during autofill
* **Blue button (Idle)**: Ready to start a new autofill session
## Managing Profiles
### Viewing Profile Details
Click the information icon next to any profile to see:
* All saved responses
* Response values
* Skip status for optional questions
* Additional arguments or metadata
### Exporting Profiles
Profiles can be exported in multiple ways:
1. Click the export dropdown next to a profile
2. Select "Download as JSON"
3. Save the file to your computer
1. Click the export dropdown
2. Select "Copy to clipboard"
3. Share the JSON data with team members
1. Click the link icon next to a profile
2. The URL with pre-filled data is copied to your clipboard
3. Share this URL to let others start with your responses
### Importing Profiles
You can import profiles from other users:
1. Click "Import" in the profiles modal
2. Select a JSON file containing profile data
3. The profile will be added to your list
1. Copy profile JSON data to your clipboard
2. Open the profiles modal
3. Click "Paste" if a valid profile is detected
Open a shared URL containing the `prefill` parameter, and the profile will automatically start playing
### Deleting Profiles
To remove a profile:
1. Click the trash icon next to the profile
2. The profile will be permanently deleted from localStorage
Deleted profiles cannot be recovered. Consider exporting important profiles before deletion.
## URL Sharing
The autofill feature supports sharing pre-filled chatflows via URL:
### Creating a Shareable URL
1. Save a profile with your desired responses
2. Click the link icon next to the profile
3. The URL is automatically copied to your clipboard
### URL Format
URLs use compressed data to keep them short:
```
https://example.com/chatflow/flow-key?prefill=[compressed-profile-data]
```
The profile data is:
1. Converted to JSON
2. Compressed using LZ-string compression
3. URI-encoded for safe URL transmission
### Using Shared URLs
When someone opens a shared URL:
1. The profile data is automatically extracted
2. The chatflow starts filling in responses immediately
3. Users can stop or modify responses as needed
### Error Handling
The autofill system handles various error scenarios:
* Invalid response submissions
* Network failures
* Malformed profile data
* Template mismatches
## Best Practices
Use descriptive names that indicate the test scenario or user type
Export important profiles regularly to prevent data loss
Create separate profiles for different test scenarios and edge cases
Share profiles with team members to ensure consistent testing
## Demo Video
 ## Troubleshooting
### Common Issues
* Ensure the chatflow is at the starting position
* Check that the profile matches the current template
* Verify no other autofill is currently running
* Profiles are stored per browser and device
* Check if browser data was recently cleared
* Verify you're using the same template
* Validate the JSON structure matches the expected format
* Ensure the template key matches your current chatflow
* Check for any console errors
* Verify the URL hasn't been truncated
* Check that the prefill parameter is properly encoded
* Ensure the recipient is on the correct chatflow template
## Limitations
* Profiles are template-specific and won't work across different chatflows
* Browser storage limitations may affect the number of profiles you can save
* Very large profiles may create URLs that exceed browser limits
* Autofill cannot handle dynamic validations that depend on external data
## Troubleshooting
### Common Issues
* Ensure the chatflow is at the starting position
* Check that the profile matches the current template
* Verify no other autofill is currently running
* Profiles are stored per browser and device
* Check if browser data was recently cleared
* Verify you're using the same template
* Validate the JSON structure matches the expected format
* Ensure the template key matches your current chatflow
* Check for any console errors
* Verify the URL hasn't been truncated
* Check that the prefill parameter is properly encoded
* Ensure the recipient is on the correct chatflow template
## Limitations
* Profiles are template-specific and won't work across different chatflows
* Browser storage limitations may affect the number of profiles you can save
* Very large profiles may create URLs that exceed browser limits
* Autofill cannot handle dynamic validations that depend on external data